Here is a detailed guide that has been written to help users to import EML files into Outlook. It provides a step-by-step process that makes the conversion of email data from various platforms to Outlook smooth and hassle-free.
EML and PST are two different types of file formats used by email clients. EML is a file format developed by Microsoft for Outlook and Outlook Express. It is also used by other email clients like Windows Live Mail, Thunderbird, and Apple Mail. On the other hand, Outlook PST format (Personal Storage Table) is a file format used exclusively by Microsoft Outlook. It stores email messages, contacts, calendar events, and other items.
Ways to Import EML Files into Outlook
The process of importing EML files into Outlook involves converting these files into the PST format. The EML to PST conversion is necessary because while EML files are widely used, Outlook does not natively support this format. Therefore, if you’re transitioning from an email client that uses EML file to Outlook, you’ll need to convert your EML to PST format. Our guide provides a comprehensive step-by-step process to help you accomplish this task seamlessly.
Table of contents
- How to batch import EML files with folders to Outlook
- Importing single EML file to Outlook using drag-n-drop
- Use Live Mail for EML conversion
- Use Outlook Import feature
Preparing the data for the conversion
The first thing you need to do even before starting EML to PST Converter is to prepare your data. The EML message format is supported by the majority of email clients, and messages can be exported in a number of ways: from manual extraction of individual messages using drag-n-drop to mass email export via integrated or third-party tools. In this manual, we will not look at these methods in great detail and assume that your emails have already been extracted from the source application or arсhive to a folder on your hard drive (or network location).
If your files were initially exported on a Mac or Linux machine, don’t worry – EML to PST Converter has built-in encoding conversion tools that ensure full readability of converted emails on the destination system.
Import EML to Outlook PST via Our Automated Tool
EML to MS Outlook Converter is a compact, laser-focused tool that dramatically simplified the conversion of email messages in the EML format to Outlook and Outlook’s PST files. Designed and developed to be used by the broadest audience possible, this program has a minimum of control elements and conversion options and generally does not require any technical skills or relevant experience.
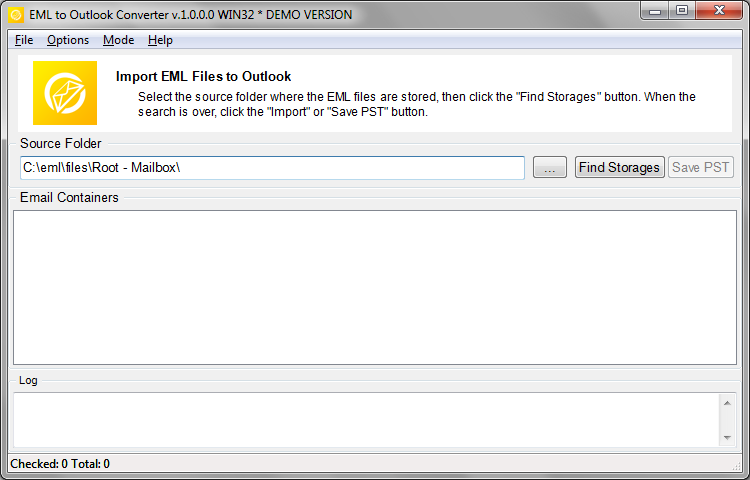
The product has a simple single-window interface with several distinct areas, buttons and a main menu. The central area is dominated by a large list box containing the names of email files that the program manages to find in the specified folder. Above this area is a field containing the path to the source location and a button that opens the standard folder selection dialog. To the right of this button is the “Find Storages” button that populates the list below and the most important button in the entire interface – the data saving button. Finally, there is a relatively small log area at the bottom of the program window.
Program installation
We guarantee that the program installation package does not contain any adware or spyware. Please make sure you download EML to PST Converter from the official website and not from any software archive or unknown third-party site. After the download is finished, run the installation file. Note that if you have UAC (User Access Control) enabled, you will see a warning message asking you to either allow the program to run or cancel its further execution. Answer yes to continue with the program installation. By default, EML to PST Conversion tool creates a program group in the Start menu and two shortcuts (for 32-bit and 64-bit versions) on your desktop.
Once you have prepared your data, you can proceed to convert and import eml files to Outlook.
Here is how to import eml files into outlook:
- Start EML to PST Conversion tool by clicking its icon in a corresponding folder of the Start menu or a shortcut on your Desktop. Depending on your Outlook version, use either the 32-bit or 64-bit version of the program for better performance. (* – Windows OS version is not affected by this rule).
- Click the button with three dots (ellipsis) located to the right of the source folder field. This will open the standard folder selection dialog. Browse to the necessary folder on your hard drive or network computer and confirm your selection by clicking OK. The path to the selected folder will be displayed in the source location field to the left.
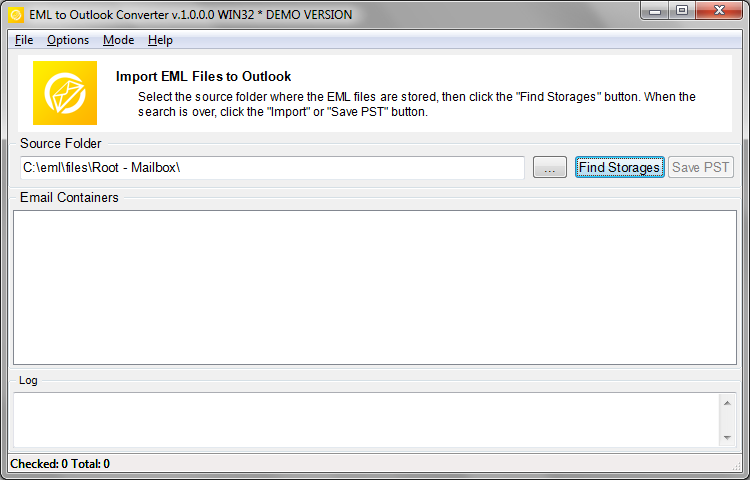
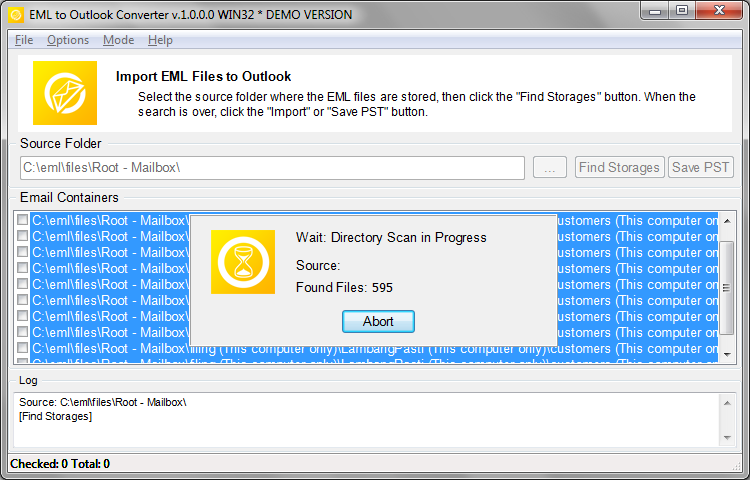
- Use the “Find Storages” or “Scan Folder” (depending on program edition) button to locate all email files and folder structure in the specified directory.
- Source files are displayed in the list of mail containers. Files in the list can be selected using the checkboxes to the left of the file names. You can select, deselect and unselect from the pop-up menu by right-clicking on the file list.
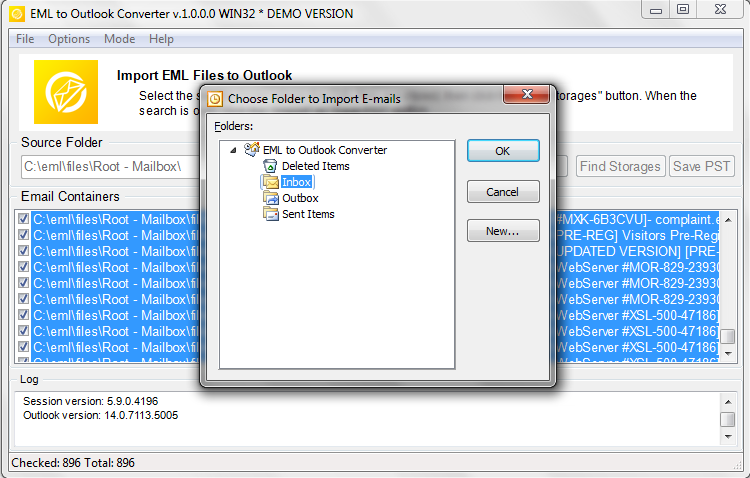
- Click the “Import” button. The program will open an MS Outlook folder selection dialog. Select an existing folder or create a new one using a corresponding dialog button, then click OK to start exporting all the eml files to Outlook.
The program will start saving your emails to the selected folder. When eml files successfully converted The conversion results are displayed in the log window at the bottom of the program window.
Configuring the conversion options
Prior to starting the email conversion process, you may want to configure the conversion options. They can be found in the “Options” section of the main menu of the program:
- Check that email client is running – if this option is on, it checks if Microsoft Outlook application is running on your computer and if it is, asks you to close it to prevent potential data access conflicts that may make further data conversion impossible.
- Remind to disable antivirus – if this option is enabled and there is an anti-virus tool running on your system, EML to PST Converter will ask you to close it or disable the active protection mode, since it may interfere with the conversion process.
- Use internal format processor – when enabled, the option will instruct the program to use its own data file parser that often works better than the standard one.
- Correct Email Encoding (Mac/Unix to Win) – when selected, this option makes sure that email files copied from a Mac or Unix system are properly pre-processed and their content remains fully readable on the destination PC. You must enable this option if you want to transfer eml files from a system other than Windows.
- Prompt to select the Outlook profile – enable this option if you want to be able to select the Outlook profile where your files will be saved. * – only for Outlook importing mode.
- Target Outlook folder [Prompt to select the Outlook folder; Inbox] – the default destination folder for converted messages. You can specify it manually every time the files are converted or simply set it to “Inbox” for all future conversions.
You can also choose between two conversion modes that are selected in the “Mode” section of the main menu:
- Import to Outlook – your data are saved directly to an Outlook profile
- Save to PST file – your data are saved to a separate PST file on your hard drive
Depending on the choice of the conversion mode, the caption on the conversion button will change to reflect your choice.
If you have already selected the files to be converted and configured the conversion options, you can proceed to saving your data to the selected location. Let’s assume that you are exporting emails directly to Outlook. Here’s what you need to do:
In case you selected the “Save to PST file” option, you will have to go through the same procedure, save for the destination folder selection step. Instead, you will need to specify the name and location of the resulting file. The rest of your actions will remain the same.
This is the end of the EML to PST Converter user’s manual. As you can see, the program is as simple and straightforward as possible, and should not pose any difficulties even for the most inexperienced users. However, if you have any problems or questions, please do not hesitate to contact our support service.
Manual methods
Method 1: Drag and Drop
The easiest way to import EML to Outlook is to use the drag and drop feature.
First, open the folder where your EML files are stored. Then open Outlook and navigate to the folder where you want to import the EML data. Now select the EML file you want to import from the folder and drag eml files to the desired folder in Outlook. This method is simple and doesn’t require any additional software. However, it will not work if you have multiple EML files to import. Some Outlook versions does not always have support for this method.
Method 2: Use Windows Live Mail
Another way to import EML to Outlook is to use Windows Live Mail.
First, open Windows Live Mail and click ‘File’, then click ‘Import Messages’. Select ‘Microsoft Outlook Express 6’ and click ‘Next’. Browse to the location of your EML file and click Next. Select the folders you want to import or select ‘All folders’ and click ‘Next’. When the import process is complete, click ‘Finish’. Now open Outlook and go to ‘File’ then ‘Open & Export’ and select ‘Import/Export’. Select ‘Import from another program or file’ and click ‘Next’. Select ‘Outlook Express 4.x, 5.x, 6.x or Windows Mail’ and click ‘Next’. Browse to the location of your Windows Live Mail files (usually in the Documents folder), select the folders you want to import, and click Finish to import eml into outlook.
Method 3: Use Outlook’s import feature
Outlook itself has a built-in ability to import multiple EML files from some email clients.
To use this, open Outlook and go to ‘File’, then ‘Open & Export’, then select ‘Import/Export’. In the Import/Export Wizard, select ‘Import from another program or file’ and click ‘Next’. Select ‘Outlook Express 4.x, 5.x, 6.x or Windows Mail’ and click ‘Next’. Browse to the location of your EMLs, select the folders you want to import, and click Next. Select the Outlook folder where you want to save the imported files and click ‘Finish’. This method is a little more complex and import eml into outlook may not work with all versions of Outlook.
Method 4: Using a Third-Party Tool
Disadvantages of manual methods
Manual methods of converting EML file data to Outlook can be time-consuming and complex, especially for users with limited technical knowledge. The process often involves multiple steps, increasing the risk of error or data loss while import EML to Outlook. Manual conversion may not preserve the original formatting and structure of the emails, including attachments, headers, and metadata. It also lacks the ability to convert large volumes of EML files at once, making it inefficient for organizations or users with large email archives. In addition, manual methods do not provide options for selective conversion or filtering of emails based on specific criteria.
Conclusion
In conclusion, while manual methods to export EML file to Microsoft Outlook application are available, they come with several drawbacks. These include potential data loss, complexity, time inefficiency, and lack of advanced features such as bulk conversion and selective filtering. Therefore, for users seeking a reliable, efficient and user-friendly solution, automated tools or professional services for EML to PST conversion may be a more suitable option.
FAQ
Can I import EML files into Outlook?
Yes, you can import EML files to Outlook. There are several ways to do this, but the best one we can recommend is to use EML to Outlook Converter software.
Are there any limitation for automatically importing EML files into Outlook?
Free trial version of EML Converter utility allows you to import limited number of EML files to MS Outlook, no other restrictions are applied.
Which method should I choose to import EML files in Outlook 2021?
Modern versions of Outlook may only accept the auto-type method with the help of special software.


